25 May 2015

Brackets support for space-separated plain text robotframework files

I finally pushed the bits that allow the robot framework extension for the brackets editor to support the space-separated format. That format seems to be the preferred format for a lot of people, so hopefully a few more people will start using brackets. This feature is available starting with version 1.2.0 of the extension.

Here is a screenshot showing the robot framework acceptance tests. The screenshots are from OSX, but it works just fine on windows too.

image
(click image to enlarge)

My team doesn’t use the space-separated format, so this code hasn’t gone through very must testing. If you use the space separated format and notice some bugs or unexpected behavior, please submit a bug report here: https://github.com/boakley/brackets-robotframework/issues

8 February 2015

Can an API change the world?

Well, there went my weekend.

Recently I stumbled on the Tin Can API (a.k.a. xAPI, a.k.a. Experience API), and decided to devote my Saturday to playing around with it. This post is more about the API than it is about testing, but I promise there’s a test automation component to this story.

Getting it. Or not.

When I first started reading through the first pages of documentation I thought “ok, e-learning. Tin Can API is a RESTful interface for that. Cool. I get it.”. If you’re a developer, you might be thinking along the same lines. It’s easy to imagine how one might put a RESTful API in front of an e-learning system.

Only, I didn’t really get it, and at this moment you probably don’t, either. It is so much more than just a RESTful interface to an e-learning system.

The tin can API is a new standard, meant to be the successor to SCORM. I had never heard of SCORM before, so that didn’t mean a whole lot to me. Fortunately, scorm.com provides a free non-commercial trial of ScormCloud that includes support for the tin can API, so it looks like it should be easy to write some simple experiments. I love free trials of web services.

The webinar black hole

I created a ScormCloud account, and then started reading some of the API docs and drilling deeper into the Tin Can API home page. As I was poking around I came across a podcast titled The Impacts of the Tin Can API: How 8 Companies are Using the Tin Can API (xAPI). Not big on marketing webinars but curious about how the tin can API is being used, I clicked play.

Big mistake. That video threw a real monkey wrench into my hacking plans. I was so blown away by the stories, all I could do was let my mind wander and wonder about all of the possibilities. There were more videos on the same page, and the next thing I know, several hours had gone by. I was stoked.

Working code, in the time it takes to bake a pizza

I was also hungry. It was lunchtime. I’m a programmer, so… pizza! I popped a frozen pizza in the oven, came back to my desk, and figuratively rolled up my sleeves. I really didn’t want the day to pass without writing some code, even though the videos were really fascinating.

Since my current gig has me writing software for automated testing, I figured I could start there. We use a tool called Robot framework which has a feature where I can supply python functions that it will call each time a test suite or test case finishes. Since there’s a python client library for the API, perhaps I can save test results to my StormCloud account.

Literally in the time it took my pizza to cook (18 minutes) I had working code that would take a test case or test suite result and stream messages (“statements” in xAPI terminology) to my StormCloud LRS (Learning Record Store) as the test was running. 18 minutes from never having written a single line of tin can API code to having a working solution. That rocks.

Can I use it in the real world?

Now, why would I want to save test results to a LRS? I don’t know, I probably don’t want to use an LRS to just monitor test results. However, I can think of two related use cases right off the top of my head that are intriguing.

I work for a public company, and when new code is published to our production systems we have some compliance hoops we need to jump through to prove our software was properly tested. Imagine if our deployment process including using the tin can API to record which parts of the application were tested, when, and by whom, during the final deployment? That might be very useful, and I’m guessing it would be relatively easy to implement.

Another area where it might be useful is in the on-boarding and training of our automated test engineers. We have a lot of self-guided exercises and wiki pages, but we rely mostly on the honor system as to whether someone worked through the exercises or not. Imagine capturing which wiki pages they read and which exercises they ran, and compare that to which (if any) tests they were able to run? This would allow us to track their performance, and to fine tune our training strategies based on which exercises yielded the most positive results. This could help both the trainer and trainee.

Getting usage information

Finally, I’m thinking maybe I could bake this into my robot framework extension for the brackets editor. I could use the API to find out which features users are using the most, and if any features are going completely unused.

Tip of the iceburg

This is just the tip of the iceberg. Not even that – it’s an ice cube in a glass of tea that is sitting on the tip of an ice berg. The possibilities really do seem endless. The videos showed me where the tin can api was used in a childrens museum, on a firing range with US soldiers, in mobile apps, websites, gamification, compliance, and the list goes on.

Can an API change the world?

Can an API change the world? Maybe that’s an outlandish thing to say. However, the Tin Can API has the potential to enable some really amazing things in the years to come. Right now I am very envious of the people working in the e-learning space because the Tin Can API is very cool.

5 February 2015

Introducing robotframework-lint support in brackets

I’m happy to announce that the robot framework extension to brackets now includes integration with robotframework-lint.

image
(click image to enlarge)

The robot extension for brackets now has a very robust set of features:

  • syntax highlighting
  • code folding
  • smart tab key for inserting pipes
  • run tests from within the editor
  • quickly select contents of a single cell
  • autocomplete and inline documentation via robotframework-hub
  • search for keywords
  • lint support via robotframework-lint

Of course, many of the advanced features of brackets are also available when editing robot files, including:

  • multiple cursors
  • split screens
  • search and replace across files
  • customizable themes

Using the linting feature

The use of robotframework-lint is hooked into the standard linting mechanism of brackets, so you can control whether the window of items will appear or not. In all cases, one or more violations will cause a yellow triangle to appear on the status line.

To use the linting feature you simply need to define how to run robotframework-lint. Do this by selecting “Robot Settings…” from the “Robot” menu, which will display a dialog allowing you define how to call rflint.

You can include any rflint arguments that you want. The current file being edited will be added at the end of the command. The easiest way to do this is to put all of your options in a file, and reference that file with the -A/–argumentfile option.

For example, if you have an argument file named /Users/bryan/rflint.args, you can change the settings to be rflint -A /Users/bryan/rflint.args (note: you cannot use ~ to represent your home directory; you need to use an absolute filename)

Once it has been configured, robotframework-lint will be called every time you save a .robot file. If rule violations are detected they will appear at the bottom of the window. Clicking on an item will move the cursor at or near where the violation was detected.

More information on robotframework-lint

For more information about robotframework-lint see robotframework-lint wiki

Acknowledgements

A huge thank-you to my current employer, Echo Global Logistics who generously allows me to work on this project as part of my day job.

26 January 2015

Announcing robotframework-lint 0.5

After a bit too long of a delay I’ve finally published version 0.5 of robotframework-lint. I’m officially calling this beta software now, and it’s actually quite close to production-ready. All it really needs is a bit more real-world use.

One of the biggest changes is that rules can be configured. For example, one new rule checks for lines that are greater than 100 characters. If that threshold doesn’t work for you, you can set your own threshold with the --configure option. The --configure option accepts a string of the form ”<rule name>:value”.

For example, to configure the LineTooLong rule to flag a warning if a line exceeds 80 characters instead of the default 100 you would use it like this:

$ rflint --configure LineTooLong:80 

Along with this change comes a small handful of new rules, some of which were contributed by Guy Kisel. Guy also gave some input into the configurable rule feature. Thanks, Guy!

  • LineTooLong
  • FileTooLong
  • TrailingBlankLines
  • TooManySteps (provided by guykisel)
  • TooManyTestCases (provided by guykisel)

tip: to see the documentation for a rule, use the --verbose option along with the --list option (eg: rflint --list --verbose). The formatting is a little wonky, which we’ll fix in a later release.

Other than that, there were a few bug fixes, and a new feature added to allow rule-writers to have access to the raw text in case data you wanted to check was being thrown away or altered by the parsing process.

Getting rflint

robotframework-lint is available from pypi, which means you can install it with pip:

$ pip install --upgrade robotframework-lint

Use the source, Luke!

robotframework-lint is hosted on github:

https://github.com/boakley/robotframework-lint

I love feedback!

If you are using robotframework-lint, or are considering using it, or have decided not to use it, I’d love to hear from you.

Acknowledgements

A huge thank-you to my current employer, Echo Global Logistics (http://www.echo.com) who generously allows me to work on this project as part of my day job.

Thank you also to Guy Kisel who has submitted some new rules.

22 December 2014

Announcing robotframework-lint 0.4

I just pushed version 0.4 of robotframework-lint to pypi. While we’re not quite at a 1.0 release just yet, this release is a major step forward. Following is a brief summary of the major new features:

rflint command

Prior to this version, to run rflint you needed to call it like this:

$ python -m rflint <options> <files...>

Starting with this version, a “rflint” command is installed along with the rflint module. On windows this will be a .exe, on other platforms it’s a script.

Directory processing

If you give rflint a path to a directory, it will process all of the files in that directory that end with “.robot”, “.txt” or “.tsv”. If you supply the –recursive option, it will also recurse into every child directory.

Argument files

You now have the ability to create a file that defines the severity level for all rules. This has the same syntax as robot framework argument files, and even the same option name.

For example, if you always want to ignore RequireSuiteDocumentation, and you want an error for RequireKeywordDocumentation, you can create a file that looks like this:

# rflint.args
--ignore RequireSuiteDocumentation
--error RequireKeywordDocumentation

If you name your file ‘rflint.args’ you can use it like so:

rflint --argumentfile rflint.args file1.robot file2.robot ...

Other improvements

In addition the above major features, there have been several other enhancements, such as only printing filenames for files that actually have warnings and errors. Rflint now treats unicode non-breaking spaces correctly, and if you give unknown files on the command line rflint will write warnings to stdout. Finally, the list option (–list/-l) can be combined with the verbose option (–verbose/-v) to display both rule names and their documentation.

Getting rflint

robotframework-lint is available from pypi, which means you can install it with pip:

$ pip install --upgrade robotframework-lint

Use the source, Luke!

robotframework-lint is hosted on github:

https://github.com/boakley/robotframework-lint

Acknowledgements

A huge thank-you to my current employer, Echo Global Logistics (http://www.echo.com) who generously allows me to work on this project as part of my day job.

Thank you also to Guy Kisel who has submitted a few issues and patches.

30 November 2014

robotframework-lint preview

I’d like to introduce a preview release of a new tool I’m developing called robotframework-lint.

Robotframework-lint, or rflint for short, is a lint-like static analysis tool for robot framework plain text files. For a given test suite or resource file it will run a series of rules against the suite, its test cases and keywords.

The purpose is to automatically detect certain anti-patterns in your test assets. For example, it can catch duplicate test case or keyword names, flag deviances from local standards such as disallowing spaces in tag names.

A brief example

Consider the following test suite file:

*** Test Cases ***
| Hello, rflint!
| | [Tags] | example tag
| | log | hello, rflint!

This is what happens when you run rflint against this file:

$ python -m rflint hello.robot 
+ hello.robot
W: 1, 0: No suite documentation (RequireSuiteDocumentation)
E: 2, 0: space not allowed in tag name: 'example tag' (TagWithSpaces)
E: 3, 0: No testcase documentation (RequireTestDocumentation)

Rflint caught three problems:

  • A warning that there is missing suite documentation on line 1
  • An error saying that there is a tag with a space on line 2
  • An error that there is missing test case documentation on line 3

If you want to ignore the TagWithSpaces error you can control that from the command line:

$ python -m rflint --ignore TagWithSpaces hello.robot
W: 1, 0: No suite documentation (RequireSuiteDocumentation)
E: 3, 0: No testcase documentation (RequireTestDocumentation)

rflint will exit with a zero exit code if no errors were found. Otherwise the exit code represents the number of errors. You can use this in a CI server or commit hook to prevent a test from being accepted if it has any errors.

Interactive help

You can get a list of all of the command line options by using the --help option:

$ python -m rflint --help
usage: python -m rflint [-h] [--error <RuleName>] [--ignore <RuleName>] [--warn <RuleName>] [--list]
                        [--no-filenames] [--format FORMAT]
                        ...

A style checker for robot framework plain text files
...

You can get a list of all of the currently installed rules with the --list option:

$ python -m rflint --list
'E DuplicateKeywordNames'
'E DuplicateTestNames'
'E RequireKeywordDocumentation'
'W RequireSuiteDocumentation'
'E RequireTestDocumentation'
'E TagWithSpaces'

A simple rule

Rules are python classes that implement an apply method. Depending on the inherited class, a rule may be given a reference to a suite object, a testcase object, or a keyword object.

Here is an example rule that checks for duplicate test case names within a suite:

import rflint.rule as rule

class DuplicateTestNames(rule.SuiteRule):
    '''Verify that no tests have a name of an existing test in the same suite'''
    severity = rule.ERROR

    def apply(self, suite):
        cache = []
        for testcase in suite.testcases:
            if name in cache:
                self.report(suite, testcase.linenumber, "Duplicate testcase name")
            cache.append(name)

Adding custom rules

Built-in rules can be found in the rules folder inside the rflint module. Rules are also looked for in a folder named site-rules, which is where your custom rules should go.

Where can I find robotframework-lint?

rflint is available on github: https://github.com/boakley/robotframework-lint

You can also install with pip, which will install the module “rflint” in the standard place:

$ pip install robotframework-lint

Online documentation

Being a preview release, documentation isn’t complete. However, what documentation there is can be found on the github wiki for the project, here:

https://github.com/boakley/robotframework-lint/wiki

Want to contribute?

Would you like to contribute? I would love to have help growing rflint into an indespensible part of the robot framework toolchain. There is an opportunity to work on the base code, or to contribute rules. Simply fork the repository and submit pull requests. You can also ask questions on the robotframework-users mailing list.

Acknowledgements

A huge thank-you to my current employer, Echo Global Logistics (http://www.echo.com) who generously allows me to work on this project as part of my day job.

9 September 2014

Robot extension for brackets 1.0.0

After a bit too long of a delay, version 1.0 of the robot framework extension for brackets is available. Download and install it in the usual way, through the extension manager.

This version brings two significant new features: keyword search, and the ability to run tests right from within brackets. Both of these features are available via hotkey, but can also be started from the new Robot menu on the menubar.

If you are running the robot framework hub, you can search through all of the keywords right from within brackets. From the Robot menu select “Show keyword search window” and it will display a list of keywords along with their synopsis. You can filter the list, and there is a link that allows you to paste the highlighted keyword into the editor.

image

Test runner

Version 1.0.0 now includes the ability to run robot right from within the editor. When you run a test, a window will slide up from the bottom with the output of the pybot/jybot command.

The command to be run is configurable. If you include the string %SUITE in the command, it will be replaced with the name of the suite that is currently being edited. For example, if you are editing “smoke.robot”, “%SUITE” will be replaced with “smoke”. This would typically be used with the –suite option.

image

Robot Menu

This version adds a “Robot” menu to the menubar, which provides a way to learn the shortcuts associated with the test runner and keyword search.

Bug fixes

In addition to the new features, a few small bugs have been ironed out as well, such as better support for dark themes.

20 August 2014

Why I like pipe-formatted tests

Robot framework supports several different formats for its test cases. You can write tests in HTML, reStructuredText, tab-separated values (eg: export from a spreadsheat program), and plain text with either pipe-separated fields or space-separated fields.

Each format has advantages and disadvantages, mostly centered around how easy it is to write the tests vs how easy it is to read the test after it has been created. These two goals are sometimes in conflict with each other.

This article gives a very brief rundown of the advantages of each, and covers why I eventually came to embrace the pipe-separated plain text format as the best of the available formats.

HTML

HTML is my least favorite format for test cases. This is due to two reasons: it can be difficult to write the tests, and it can be difficult comparing two versions of a test.

The tests are difficult to write because HTML editors aren’t optimized for writing robot, so you’re trying to write test cases in a tool designed to create websites. The tool has a different goal than the user. Of course, you can use a plain text editor, but then you’re cursed with having to hand-edit HTML tags (though, smart editors can help ease that pain).

Because your test case data is wrapped in HTML tags, it can make the test cases hard to diff and merge simply because of all of the extra markup. Worse, in my experience, different web editors may introduce differences in the markup by adding or removing whitespace or linebreaks. If the people in an organization use different tools, it can cause problems for comparing versions of a test case – a single line change to a test case in a different tool may end up reformatting the whole file.

reStructuredText

Using reStructuredText has an advantage similar to HTML in that you can create test documents that are very easy to read. Writing reStructured text is at least arguably easier to write than HTML since the markup doesn’t rely so much on tags as it does simple conventions, so you get the best of both words – fairly easy to write, and definitely easy to read.

What I don’t like about reStructuredText is that it’s still a bit verbose. While you can “draw” test tables that indeed look like tables, you have to draw test tables that look like tables. Since the focus of writing tests should be on the logic and data of the test, having to spend extra effort to make the tables look like tables is onerous.

There’s another option where you can use code blocks. Within a code block you can use the space-separated format. However, if you’re going to use the space-separated format, why add the extra complexity of reStructuredText on top of it?

I would be interested in hearing from someone that is successfully using reStructuredText for their tests. Maybe I can be convinced it’s the way to go.

Tab-separated values

My first exposure to robot was at a company where we settled on the tab-separated format. This is arguably the easiest to type when using a standard text editor, since it’s just a single keypress to start a new cell. The problem with tab-separated files, in my opinion, is the fact that it’s hard to distinguish between a tab and just a bunch of spaces. And, depending on your tab stops, a single tab may often look like a single space, leading to ambiguity.

You also have the same (dis?)advantage as using tabs in software – different people have different settings for tab stops. Some see this as an advantage, but often results in code that lines up and reads properly to one person but not another.

Plain text, space-separated format

The plain text, space-separated format seems to be the most popular. This is the format that the robot framework inventor uses, and many examples I see on the internet use this format. It has the advantage that test cases can read very much like English language, which definitely is one of the main appeals of using a keyword driven testing language.

The Achilles heal of this format, in my opinion, is that it leads to ambiguity. Two spaces can separate two cells in a row, but in print and on websites it’s can be difficult to visually distinguish one space from two. To work around that, the robot framework user guide suggest using four spaces, but then you lose some of the readability, plus it’s just a pain to type four spaces between each cell.

Plain text pipe-separated format

This is the format I prefer, because I think it strikes a nice balance between being easy to read and write. It has many of the same advantages as the space- and tab-separated formats, but it has one distinct advantage in that it is much less ambiguous. There’s no denying the presense of a pipe between two fields.

The downside to the pipe separated format is that pressing space-pipe-space is tedious, and also difficult to say out loud when teaching others. Another downside is that the presense of a pipe removes some of the “english-like” features of the space separated performance.

In fact, having to type a pipe is a pretty big downside. Just as I would not want to type four spaces between two cells, typing space-pipe-space is also somewhat annoying. Not only that, but on many non-US keyboards, the pipe character is particularly hard to type. If I had one of those keyboard I would definitely gravitate toward the space-separated format.

That, to me, is just about the only real downside to using the pipe-separated format. In fact, I liked the format enough, and hated typing the pipe enough, that I wrote my own editing tools to eliminate the pain.

A few years ago I wrote a desktop app that let you type a pipe simply by pressing the tab key. You then get the ease of editing that you would get with the tab-separated-value format, but with the clarity of the pipe-separated format.

This proved to be a fantastic solution. However, I was spending a lot of my time writing a basic text editor around this single feature, rather than focusing on adding even more features.

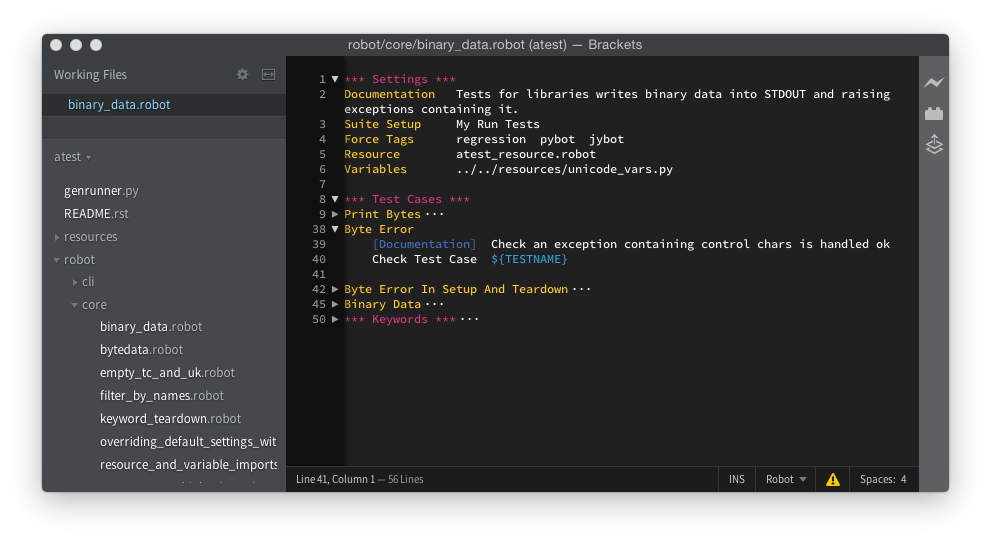
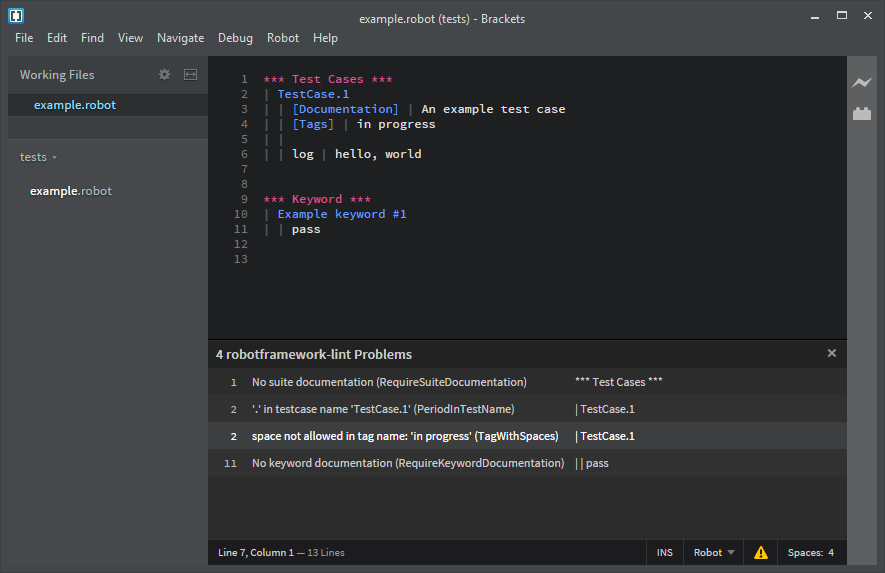
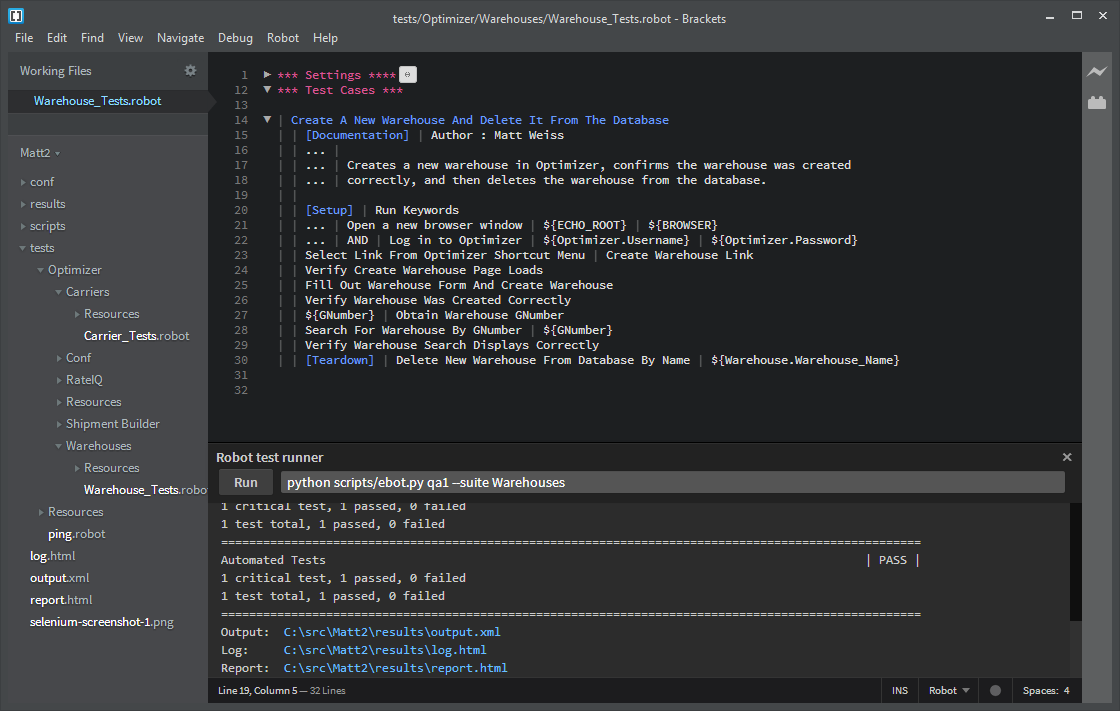
That’s when I switched to writing a robot extension for brackets. My extension has a couple of key features that I believe gives the best editing experience for robot framework tests. You have the ease of entering separators by pressing tab, the clarity that comes with pipes rather than spaces, yet the ease of reading because the pipes are rendered in a dim color, making them less dominant. And, because it is an extension to an existing editor, I can focus on adding additional features such as in-line keyword documentation, code hints, and so on.

Summary

I prefer the pipe-separated plain text format, and use that at work, and in my blog posts and answers on stackoverflow. It’s what I recommend to anyone just getting started. But honestly, all of the supported formats are great and have their place. I think that the fact they are all plain text gives robot a lot of its appeal, because the tests play very well with development tools we already use – text editors, source code control, diff, etc.

18 August 2014

Brackets robot extension 0.9.5 is out

I’ve pushed a new version of the robot framework plugin for brackets. This version has improved coding hinting support. Code hints now behave a bit more like other editors.

There is also now some basic support for hinting variables. If you type “${“, a list of all variables in the current file will be presented. I’ll be improving this in future releases to include variables defined in resource files.

Another feature is a special shortcut vv – type vv at the start of a cell to automatically insert ${}, move the cursor inside the curly braces, and bring up the list of variables. It’s a seemingly simple thing, but seems to add to the editing experience by cutting down the number of times you have to type cumbersome characters.

Finally, keyword hints (when you press control-space in a place where a keyword is likely) now includes local keywords. Prior to this change it only picked up keywords in external libraries and resource files.

For more information, see the Changelog

3 August 2014

Brackets robot extension 0.9.4

I’ve released a new version of the robot framework plugin for brackets. Important new features include:

  • syntax highlighting for argument files
  • improved hinting
  • bug fixes

To get the quickdocs feature you must be running the robot framework hub

You should be able to ugrade using the brackets extension manager.

← Newer Page 1 of 2